How to Install a Metal Shutter: Complete Guide 2025
How to Install a Metal Shutter: Complete Guide 2025
In today’s security-conscious business environment, metal shutters have become an essential installation for commercial and industrial premises. From retail stores to warehouses, businesses of all sizes benefit from the robustness and reliability of these security solutions. This comprehensive guide, prepared by the experts at Iron Métal, walks you through every step of installing your metal shutter in 2025, using the latest techniques and innovations in the industry.
The Advantages of Metal Shutters for Your Business
Before diving into the installation process, let’s explore why metal shutters continue to be the preferred choice for business security:
Enhanced Security Features
Metal shutters provide an effective physical barrier against break-ins and vandalism. The robust materials used in modern shutters make them extremely difficult to breach, serving as both a physical obstacle and a visual deterrent to potential intruders. In 2025, advanced locking mechanisms have further enhanced this security aspect, with many systems now featuring anti-lift devices and reinforced locking points.
Exceptional Durability
Today’s metal shutters are engineered to withstand extreme weather conditions, from heavy rainfall and strong winds to intense heat. The galvanized steel construction prevents rust and corrosion, ensuring your investment remains functional and attractive for years to come. Many manufacturers now offer warranties of up to 10 years, reflecting the confidence in their products’ longevity.
Thermal and Acoustic Insulation
Modern insulated metal shutters contribute significantly to energy efficiency in commercial buildings. They help maintain internal temperatures, reducing heating costs in winter and cooling expenses in summer. Additionally, they provide excellent sound insulation, which is particularly valuable for businesses in busy urban locations or those requiring confidentiality and privacy.
Customizable Aesthetics
Gone are the days when metal shutters were purely functional with limited design options. Today’s market offers a wide range of colors, finishes, and styles to complement any architectural design. Powder-coated finishes not only enhance appearance but also add an extra layer of protection against environmental damage.
Space Efficiency
Unlike traditional security doors, metal shutters roll up into a compact housing unit, maximizing valuable floor and wall space. This space-saving design makes them ideal for locations with limited room for security installations.
Automation Capabilities
The integration of smart technology has revolutionized metal shutter systems. Remote operation, timer settings, and even smartphone control are now standard features in many models, offering unprecedented convenience and control.
Property Value Enhancement
Installing high-quality security solutions like metal shutters increases property value and may reduce insurance premiums. Potential buyers or tenants recognize the value of premises with pre-installed security measures, making your property more attractive in the commercial real estate market.
Prerequisites for Installing a Metal Shutter
Successful installation begins with thorough preparation. Here’s what you need to consider before starting:
Essential Tools and Equipment
To ensure a smooth installation process, gather these tools before beginning:
- Heavy-duty drill and appropriate drill bits for concrete, metal, or wood
- Precision spirit level (preferably digital for maximum accuracy)
- Industrial-grade measuring tape
- Complete set of socket wrenches and Allen keys
- Professional-grade extension ladder or scaffolding system
- Personal protective equipment (safety gloves, goggles, helmet)
- Electrical testing equipment (for motorized versions)
- Torque wrench for precise tightening
- Angle grinder with metal cutting discs (for potential adjustments)
- Silicone sealant gun and appropriate sealant
Critical Preliminary Checks
Before purchasing or installing any metal shutter system, perform these essential checks:
Structural Assessment
Evaluate whether the wall or lintel has sufficient strength to support the shutter’s weight. This is particularly important for larger installations where the combined weight of the mechanism and shutter can exceed 100kg. For older buildings, consulting a structural engineer is advisable.
Accurate Measurements
Precise measurements are crucial for a successful installation:
- Width of the opening at multiple points (top, middle, bottom)
- Height of the opening at multiple points (left, center, right)
- Depth available for the shutter box
- Side room available for guides and mechanisms
- Headroom available above the opening
Electrical Requirements
For motorized systems, verify:
- Proximity to a suitable power source (typically requiring a dedicated circuit)
- Voltage and amperage requirements
- Potential need for a backup power system
- Space for control units and wiring channels
Regulatory Compliance
Before installation, research:
- Local building codes and regulations
- Fire safety requirements for escape routes
- Insurance company stipulations
- Heritage building restrictions (if applicable)
- Commercial property regulations
Environmental Considerations
Assess the environment where the shutter will be installed:
- Exposure to weather elements
- Potential for salt corrosion (coastal areas)
- Temperature fluctuations
- Wind load calculations for exposed locations
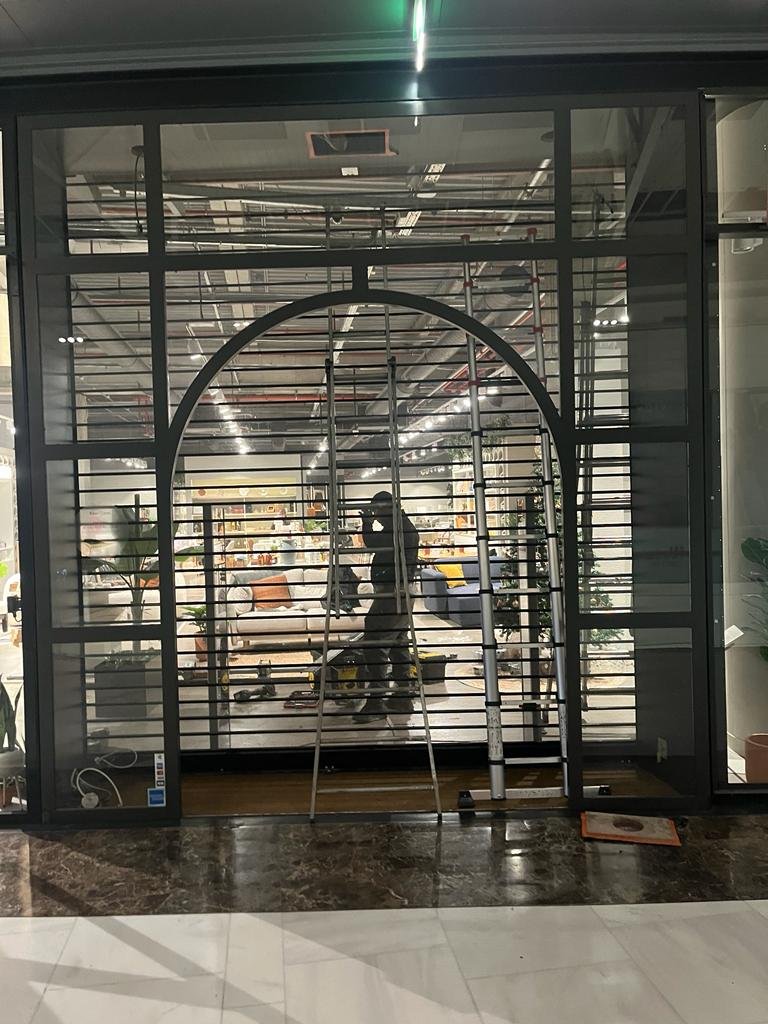
Step-by-Step Installation Process for Metal Shutters
1. Taking Precise Measurements
Accurate measurements are the foundation of successful installation:
Width Measurement Protocol
- Measure the width at three different heights: top, middle, and bottom
- Record the widest measurement
- Add recommended clearance (typically 50-100mm) for proper operation
Height Measurement Protocol
- Measure from the floor to the lintel at three points: left, center, and right
- Use the highest measurement
- Add headroom requirements as specified by the manufacturer
Shutter Box Accommodation
- Ensure sufficient space for the rolling mechanism
- Calculate based on shutter dimensions using manufacturer’s guidelines
- Allow for insulation if installing in climate-controlled spaces
2. Installing the Shutter Box
The shutter box houses the rolling mechanism and provides protection for the shutter when retracted:
Positioning the Box
- Mark the center point of the opening
- Align the box precisely using a laser level
- Ensure perfect horizontal alignment using shims if necessary
- Mark drilling points for mounting brackets
Securing the Box
- Pre-drill holes for easier mounting
- Use appropriate anchors based on wall material (expansion bolts for concrete, chemical anchors for hollow materials)
- Install brackets with proper torque
- Verify level after initial tightening
- Apply final torque settings as per manufacturer specifications
Weatherproofing
- Apply appropriate sealant around the box junction with the wall
- Install drip caps for external installations
- Ensure proper drainage for condensation
3. Installing the Side Guides
Side guides ensure smooth operation and security:
Alignment Procedure
- Position guides vertically using a plumb line or laser level
- Verify equal distance from the opening edge on both sides
- Ensure parallel alignment with precise measurements
- Temporarily secure guides to check alignment
Mounting Process
- Mark drilling points at recommended intervals (typically 300-500mm apart)
- Pre-drill holes through guides into the mounting surface
- Insert appropriate anchors
- Secure guides with proper fasteners
- Verify vertical alignment after initial tightening
- Apply thread-locking compound for permanent installations
Clearance Verification
- Check that guides are properly sized for the curtain
- Verify smooth movement within guides
- Ensure weather strips or brush seals are correctly positioned
4. Installing the Curtain
The curtain is the main protective element of the shutter system:
Curtain Preparation
- Inspect for shipping damage or manufacturing defects
- Clean guides to ensure smooth movement
- Apply lubricant as recommended by the manufacturer
Insertion Process
- With assistance, carefully feed the curtain into the guides
- Ensure even insertion on both sides
- Attach the curtain to the rolling mechanism according to manufacturer instructions
- Secure endlocks or windlocks if provided
Movement Testing
- Manually test the curtain movement through its full range
- Check for binding or resistance points
- Verify that slats interlock properly throughout operation
- Ensure bottom bar sits flush with the ground in closed position
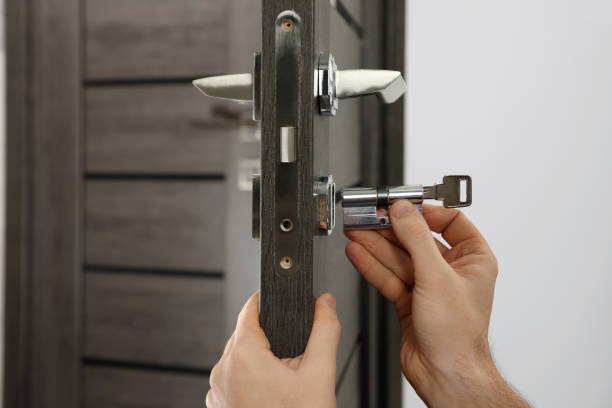
5. Electrical Connection (Motorized Version)
Modern motorized systems require careful electrical installation:
Safety Precautions
- Ensure power is completely disconnected
- Use proper lockout/tagout procedures
- Verify absence of voltage with testing equipment
Wiring Configuration
- Follow manufacturer’s wiring diagram precisely
- Use appropriate gauge wire for the distance and load
- Install protective conduit for exposed wiring
- Label all wires according to function
Control Unit Installation
- Mount control unit in an accessible location
- Ensure protection from water and environmental factors
- Connect limit switches according to specifications
- Program remote controls if applicable
Limit Switch Configuration
- Set upper limit to prevent over-winding
- Set lower limit for proper ground contact
- Program intermediate positions if required
- Verify emergency manual override function
Safety Feature Installation
- Connect safety edge sensors if provided
- Install photoelectric safety beams
- Test all safety mechanisms thoroughly
6. Testing and Adjustments
Thorough testing ensures reliable operation:
Operational Testing Protocol
- Complete a minimum of five full cycles
- Verify smooth movement throughout travel
- Check stopping points for precision
- Time operation speed for consistency
Safety System Verification
- Test obstacle detection systems
- Verify emergency stop functionality
- Confirm manual operation during power outage
- Check automatic reversal mechanisms
Final Adjustments
- Fine-tune limit switches as needed
- Adjust spring tension in manual systems
- Optimize motor speed and torque settings
- Address any unusual noise or movement
Documentation
- Record all settings and configurations
- Document any modifications from standard installation
- Provide operation instructions to the end user
- Register warranty information
Electric vs. Manual Metal Shutter Installation: Key Differences
Manual Shutter Installation Details
Manual shutters continue to be popular for specific applications:
Mechanism Options
- Push-up direct systems for smaller installations
- Chain-operated systems for medium-sized shutters
- Crank handle mechanisms for larger installations
Installation Advantages
- Simpler mechanical components
- No electrical certification requirements
- Lower initial installation cost
- Independence from power supply
- Fewer potential failure points
Special Considerations
- Proper spring tensioning is critical
- Heavier shutters require mechanical assistance
- Verify adequate operating force requirements (typically under 150N)
- Consider future upgrade path to motorized system
Electric Shutter Installation Details
Electric shutters offer convenience and are essential for larger installations:
Power Requirements
- Dedicated circuit recommended (typically 10A)
- Proper grounding essential
- Surge protection advisable
- Weather-protected connections for external installations
Motor Installation
- Proper alignment with drive shaft
- Secure mounting to prevent vibration
- Thermal protection verification
- Manual override mechanism testing
Control System Options
- Basic wall switch (simplest installation)
- Key switch for enhanced security
- Remote control receivers and transmitters
- Smart home integration components
- Commercial building management system connections
Safety System Integration
- Safety edge sensors along bottom bar
- Photoelectric beams across opening
- Motion detection systems
- Emergency stop buttons
- Backup battery systems for power outages
Professional Maintenance for Your Metal Shutter
Regular maintenance ensures optimal performance and longevity:
Quarterly Maintenance Tasks
- Remove debris from guides and box
- Clean external surfaces with appropriate products
- Inspect for signs of wear or damage
- Check and tighten any loose fasteners
- Test operation through complete cycles
Bi-annual Maintenance Procedures
- Lubricate all moving parts with manufacturer-recommended products
- Inspect electrical connections for corrosion or damage
- Check motor mounting and alignment
- Verify limit switch operation
- Test all safety systems thoroughly
Annual Professional Inspection
- Complete mechanical assessment by certified technician
- Electrical system safety testing
- Structural attachment verification
- Comprehensive safety feature evaluation
- Software updates for smart systems
Preventative Maintenance Benefits
- Extended operational lifespan (typically 15+ years with proper maintenance)
- Reduced emergency repair costs
- Maintained warranty validity
- Consistent security performance
- Minimized business disruption
Optimal Installation Techniques for Rolling Shutters
For perfect installation in 2025, follow these expert recommendations:
Timing Considerations
- Select mild weather days for installation
- Avoid extreme temperatures that can affect material expansion
- Schedule installation during business downtime
- Allow adequate time for testing and adjustments
- Consider seasonal requirements (additional weatherproofing in autumn)
Personnel Requirements
- Minimum two-person team for standard installations
- Three or more for larger commercial systems
- Certified electrician for motorized systems
- Experienced supervisor for complex installations
Preparation Recommendations
- Pre-assemble components where possible
- Verify all parts before beginning installation
- Prepare surfaces for mounting
- Create clean workspace around installation area
- Pre-route electrical conduits and cables
Technical Standards Compliance
- Follow manufacturer’s installation guidelines precisely
- Adhere to local building codes
- Comply with electrical safety standards
- Meet fire regulation requirements
- Consider acoustic performance standards for commercial zones
Quality Material Selection
- Use manufacturer-recommended fasteners
- Select appropriate anchors for the wall material
- Apply correct-grade sealants for the environment
- Choose corrosion-resistant components for external installations
- Use industrial-grade lubricants suitable for the application
Best Installation Techniques for Different Rolling Shutter Types
Different mounting methods offer distinct advantages:
External Face Mount Installation
- Mounted on the exterior wall surface
- Installation process:
- Mark vertical guide positions
- Mount guides first as reference points
- Install header box above the opening
- Insert curtain and connect to rolling mechanism
- Complete electrical connections if motorized
Advantages
- Preserves internal ceiling height
- Maximizes interior light
- Provides excellent thermal performance
- Ideal for new construction with planned installations
- Better protection against forced entry
Considerations
- Requires adequate exterior wall space
- May need planning permission in some areas
- Weather exposure requires durable components
- Potential aesthetic impact on building facade
Reveal Mount Installation
- Mounted within the window or door opening:
- Installation process:
- Measure opening at multiple points for squareness
- Install guides within the reveal
- Mount header box at the top of the opening
- Insert curtain and connect to axle
- Complete safety system installation
Advantages
- Discreet appearance
- Protected from direct weather exposure
- Compact solution for limited space
- Aesthetic integration with building design
- Suitable for retrofit installations
Considerations
- Reduces clear opening size
- May require modifications to existing frames
- Limited space for maintenance access
- Special consideration for uneven openings
Internal Face Mount Installation
- Mounted on the interior wall surface:
- Installation process:
- Mark mounting positions on interior wall
- Install header box first
- Attach guides to wall surface
- Insert curtain and connect to rolling mechanism
- Complete control system installation
Advantages
- Protection of mechanism from elements
- Easier access for maintenance
- Simplified electrical installation
- Enhanced security for motor and controls
- Suitable for sensitive architectural facades
Considerations
- Requires interior space
- Potential impact on internal fittings
- May require special consideration for emergency exits
- Acoustic impact in interior spaces
Mounting Hardware and Fixings: Technical Guidance
Proper fixings are critical for safety and durability:
Concrete Surface Mounting
- Use expansion bolts (minimum 10mm diameter)
- Drill to manufacturer’s specified depth (typically 75-100mm)
- Clean drill holes thoroughly before inserting anchors
- Torque fixings to specified values
- Consider chemical anchors for higher load applications
Brick and Block Wall Mounting
- Use frame fixings with appropriate sleeve anchors
- Ensure fixings penetrate structural material not just mortar
- Install additional backing plates for larger installations
- Space fixings at maximum 600mm intervals
- Consider through-bolting for maximum security
Wood Structure Mounting
- Use coach screws or lag bolts (minimum 8mm diameter)
- Ensure minimum 50mm penetration into structural timber
- Pre-drill pilot holes to prevent splitting
- Use washers to distribute load
- Consider reinforced mounting plates for larger systems
Metal Frame Mounting
- Use through-bolts with lock nuts
- Alternatively, use self-tapping tek screws for appropriate gauges
- Consider welding for permanent industrial installations
- Apply anti-corrosion protection at fixing points
- Ensure electrical isolation between dissimilar metals
Electrical Installation Options for Motorized Shutters
In 2025, several power options are available:
Standard Electrical Outlet Connection
- Viable for smaller residential-grade shutters
- Installation process:
- Install dedicated outlet near shutter location
- Connect motor through manufacturer’s control unit
- Test circuit under load
- Install circuit protection devices
- Label circuit appropriately
Advantages
- Simplest installation for DIY or basic professional installation
- Uses standard household voltage
- Easy troubleshooting and replacement
- No special electrical certifications required for plug-in options
Considerations
- Limited power capacity
- Potential for unplugging
- May not comply with commercial building codes
- Limited control options
Dedicated Circuit Installation
- Recommended for commercial installations:
- Installation process:
- Run appropriate gauge wire from distribution board
- Install junction boxes as needed
- Connect to motor controller according to manufacturer specifications
- Test and certify installation
- Document circuit information
Advantages
- Meets commercial building standards
- Eliminates interference from other devices
- Supports larger motors and advanced control systems
- Provides proper circuit protection
- Enables integration with building management systems
Considerations
- Requires professional electrician
- Higher installation cost
- More complex troubleshooting
- May require permits and inspections
Solar Power Options
- Increasingly popular eco-friendly solution:
- Installation process:
- Mount solar panel in suitable location
- Install battery backup system
- Connect control unit and motor
- Program energy management system
- Test under various conditions
Advantages
- Energy independent operation
- No electrical wiring required
- Continues functioning during power outages
- Reduced operating costs
- Environmentally friendly solution
Considerations
- Higher initial investment
- Requires adequate sunlight exposure
- Battery replacement costs
- Lower power capacity for very large shutters
- Potential for seasonal performance variations
Battery-Powered Systems
- Mobile solution for specific applications:
- Installation process:
- Mount control unit and motor
- Install rechargeable battery pack
- Connect charging system
- Program operation parameters
- Establish maintenance schedule
Advantages
- Completely wire-free installation
- Simple retrofitting to existing structures
- Independence from building electrical system
- Ideal for temporary installations
- Useful where power access is limited
Considerations
- Regular charging requirements
- Limited operation cycles between charges
- Reduced power for larger systems
- Battery replacement costs
- Temperature sensitivity
Professional vs. DIY Installation
Benefits of Professional Installation
Professional installation by certified experts like those at Iron Métal offers numerous advantages:
Quality Assurance
- Manufacturer certification and training
- Experience with various installation scenarios
- Access to specialized tools and equipment
- Knowledge of common issues and solutions
- Proper testing and commissioning
Regulatory Compliance
- Understanding of building codes and regulations
- Proper permits and documentation
- Electrical code compliance
- Safety standard adherence
- Insurance requirements fulfillment
Time Efficiency
- Typically completed in one day for standard installations
- Efficient troubleshooting of unexpected issues
- Coordinated team approach
- Minimal disruption to business operations
- Immediate testing and verification
After-Sales Support
- Installation warranty (typically 1-2 years)
- Priority service for issues
- Maintenance contract options
- Technical support access
- Upgrade path recommendations
Considerations for DIY Installation
Self-installation may be appropriate in specific circumstances:
Technical Requirements
- Strong mechanical aptitude
- Basic electrical knowledge (for motorized systems)
- Access to proper tools and equipment
- Ability to interpret technical instructions
- Problem-solving skills for unexpected issues
Resource Considerations
- Labor savings must be weighed against time investment
- Tool purchase or rental costs
- Potential for errors requiring professional correction
- Limited access to technical support
- Warranty implications
Appropriate Scenarios
- Smaller, lightweight systems
- Basic manual shutters
- Temporary installations
- Locations with easy access
- Projects with flexible completion timelines
Risk Factors
- Safety concerns during installation
- Potential damage to property or shutter components
- Electrical hazards with motorized systems
- Improper installation affecting security performance
- Warranty invalidation
Frequently Asked Questions
How long does it take to install a rolling shutter?
Complete professional installation typically requires 4 to 6 hours for standard-sized shutters. This timeframe includes setting up rails, springs, cables, rollers, and the motorization system if applicable. Additional time is needed for thorough testing and safety verification. For larger commercial installations or complex systems, installation may extend to a full day or more.
Can I install a metal shutter myself?
While DIY installation is possible for those with strong technical skills and appropriate tools, professional installation is recommended, especially for larger systems or motorized versions. Important considerations include:
- Technical complexity increases significantly with shutter size
- Motorized systems require electrical expertise
- Improper installation may compromise security and safety
- Manufacturer warranties often require professional installation
- Building insurance policies may have specific installation requirements
Why should I invest in a metal shutter?
Beyond the obvious security benefits, today’s metal shutters offer multiple advantages:
- Enhanced energy efficiency through thermal insulation
- Significant noise reduction for improved working environment
- Protection from extreme weather events
- Potential insurance premium reductions
- Increased property value for commercial real estate
- Access control integration possibilities
- Modern aesthetic options to enhance building appearance
What maintenance schedule should I follow for my metal shutter?
Proper maintenance ensures optimal performance and longevity:
- Quarterly: Clean guides and external surfaces, inspect for visible damage
- Bi-annually: Lubricate moving parts, check electrical connections
- Annually: Professional inspection of mechanical and electrical systems
- After extreme weather events: Special inspection for damage
- Following any impact or collision: Immediate assessment and repair
With proper maintenance, quality metal shutters can provide reliable service for 15-20 years or more.
Are modern metal shutters compliant with 2025 energy standards?
Contemporary metal shutters have evolved significantly to meet increasingly stringent energy regulations:
- Insulated slats with thermal breaks are now standard on quality shutters
- U-values have improved dramatically, with premium models achieving ratings as low as 1.5 W/m²K
- Side seal technology has advanced to minimize air leakage
- Integration with building management systems optimizes energy performance
- Some manufacturers now offer shutters that contribute to building energy certifications
What security certifications should I look for when purchasing a metal shutter?
In 2025, key security certifications and standards include:
- SR ratings (Security Rating) that indicate resistance to forced entry
- LPS 1175 certification levels (particularly important for insurance compliance)
- RC (Resistance Class) ratings under EN 1627
- Secured by Design police preferred specification
- Insurance industry approved specifications
Higher ratings generally indicate longer resistance times against forced entry attempts with various tools.
How do I choose between different types of metal shutters?
Selection factors should include:
- Security level required (basic deterrence vs. high-security applications)
- Frequency of operation (occasional vs. multiple daily cycles)
- Aesthetic requirements (visible vs. concealed installation)
- Space constraints (headroom and side room availability)
- Budget considerations (initial investment vs. long-term value)
- Environmental conditions (coastal, industrial, urban, etc.)
- Noise sensitivity of surrounding area
- Integration with existing security systems
What are the latest innovations in metal shutter technology for 2025?
The industry continues to evolve with notable advancements:
- Smartphone integration for remote monitoring and control
- Biometric access systems integrated with shutter controls
- Self-diagnosing systems that alert owners to maintenance needs
- Enhanced insulation materials for superior thermal performance
- Ultra-quiet operation motors for noise-sensitive environments
- Solar-powered options with improved efficiency
- Anti-graffiti coatings for urban installations
- High-speed operation for frequent-use applications
Why Choose Iron Métal for Your Metal Shutter Installation
Iron Métal has established itself as the leading expert in metal shutter installations across various industries. With decades of combined experience, our team brings unparalleled expertise to every project, ensuring optimal security, functionality, and aesthetic integration.
Our Comprehensive Service Offering
At Iron Métal, we provide end-to-end solutions for all your metal shutter needs:
Expert Consultation
Our process begins with a detailed assessment of your specific requirements. Our consultants analyze your security needs, architectural constraints, operational frequency, and budget considerations to recommend the optimal solution for your business.
Precision Installation
Our certified installation teams undergo rigorous training and continuous professional development to stay ahead of industry advancements. Every installation follows our proprietary 27-point verification process, ensuring flawless operation and maximum security.
Customized Solutions
We understand that every business has unique requirements. Our engineering team can develop customized solutions for:
- Unusual architectural features
- Heritage buildings with specific constraints
- High-security applications
- Extreme environmental conditions
- Special operational requirements
- Aesthetic integration challenges
Ongoing Support
Our relationship with clients extends well beyond the installation:
- Comprehensive maintenance programs
- 24/7 emergency response service
- Technical support hotline
- Upgrade options as technology evolves
- Warranty management
- Regulatory compliance updates
Our Expertise: What Sets Iron Métal Apart
Technical Excellence
- Manufacturer-certified installation teams
- Advanced diagnostic equipment
- Proprietary installation methods developed over years of experience
- Stringent quality control procedures
- Continuous improvement processes
Industry Experience
Our team has successfully completed installations across diverse sectors:
- Retail environments (from small boutiques to major department stores)
- Industrial facilities (manufacturing plants, warehouses, distribution centers)
- Commercial properties (office buildings, business parks, shopping centers)
- Public institutions (schools, hospitals, government buildings)
- High-security facilities (data centers, financial institutions, sensitive locations)
Quality Commitment
We partner only with leading manufacturers who meet our rigorous quality standards. Every component we install undergoes thorough testing and verification before and after installation.
Innovation Leadership
Iron Métal remains at the forefront of industry innovation:
- Early adopters of smart integration technology
- Pioneers in energy-efficient security solutions
- Developers of proprietary installation techniques
- Consultants for manufacturer product development
- Contributors to industry standards and best practices
Conclusion
Installing a metal shutter represents a significant investment in the security and value of your commercial property. When properly executed, this installation will provide reliable service for many years, protecting your assets while enhancing operational efficiency.
For complete peace of mind and optimal performance, Iron Métal offers professional installation services that ensure your system meets all current standards and operates flawlessly. Our qualified technicians guarantee installation according to industry best practices, compliant with 2025 regulations, and backed by responsive after-sales support.
The evolution of metal shutter technology continues to enhance security, energy efficiency, and user convenience. By choosing quality components and professional installation, you’re making a wise investment in your property’s future.
Contact us today for a personalized quote and expert advice tailored to your specific situation. With Iron Métal, you’re not just installing a security solution – you’re partnering with the industry leader in metal shutter expertise.